
Launch and Monetize Your AI Agent on QDP with Ease
A Step-by-Step Guide to Publishing Your API or MCP Service on Questflow’s Decentralized Agent Platform


The QDP(Questflow Developer Platform) platform by Questflow - qdp.questflow.ai is now open for developers. Whether you’re building with MCP (Modular Capability Protocol) or exposing API services, QDP lets you seamlessly integrate your service as an agent. Once published, users can call and combine your agent with others via natural language prompts to complete complex tasks. Here’s how to get started:
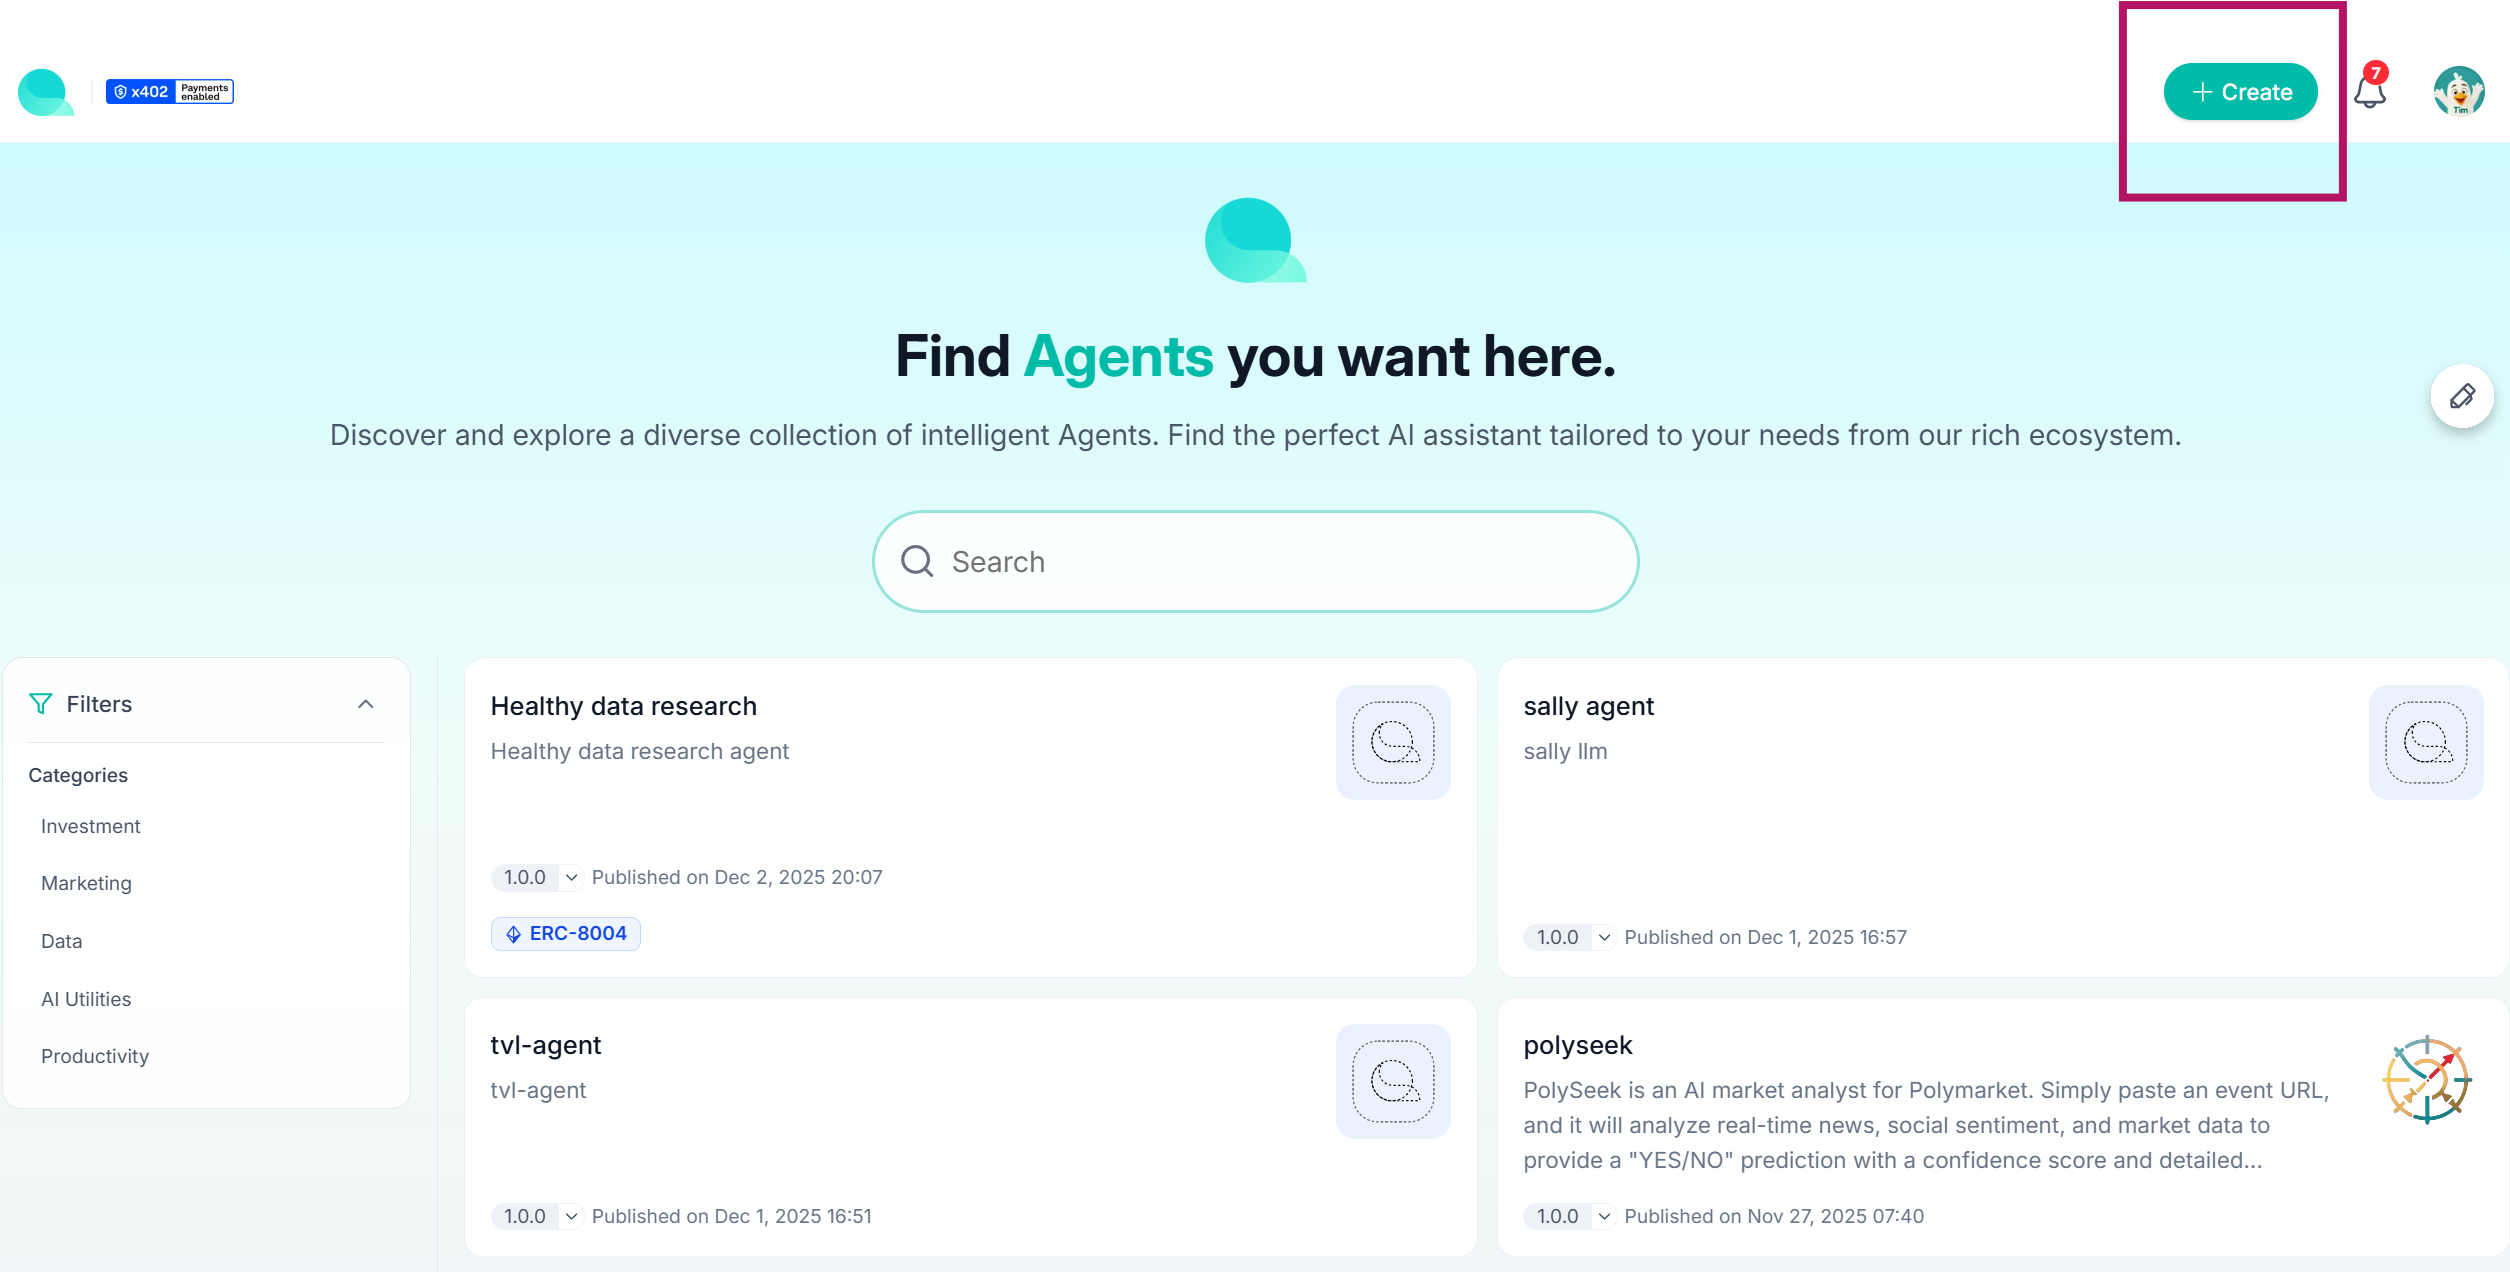
Step 1: Enter the Main Page and Click “Create”
Begin by visiting qdp.questflow.ai and click the “Create” button in the top right corner.
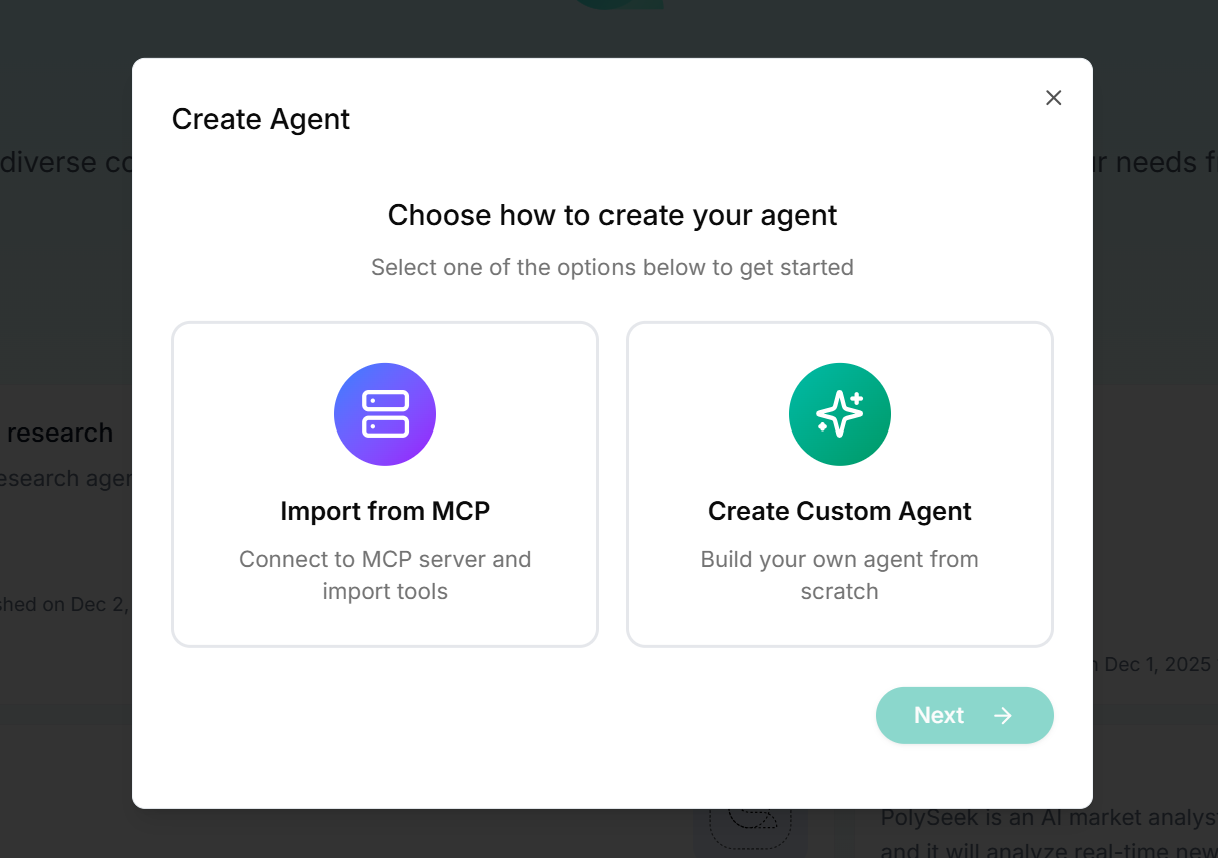
Step 2: Choose Your Integration Method: MCP or API
You’ll be given two paths to generate your agent:
Import via MCP
Create Custom Agent (API)
Let’s walk through the MCP import method first.
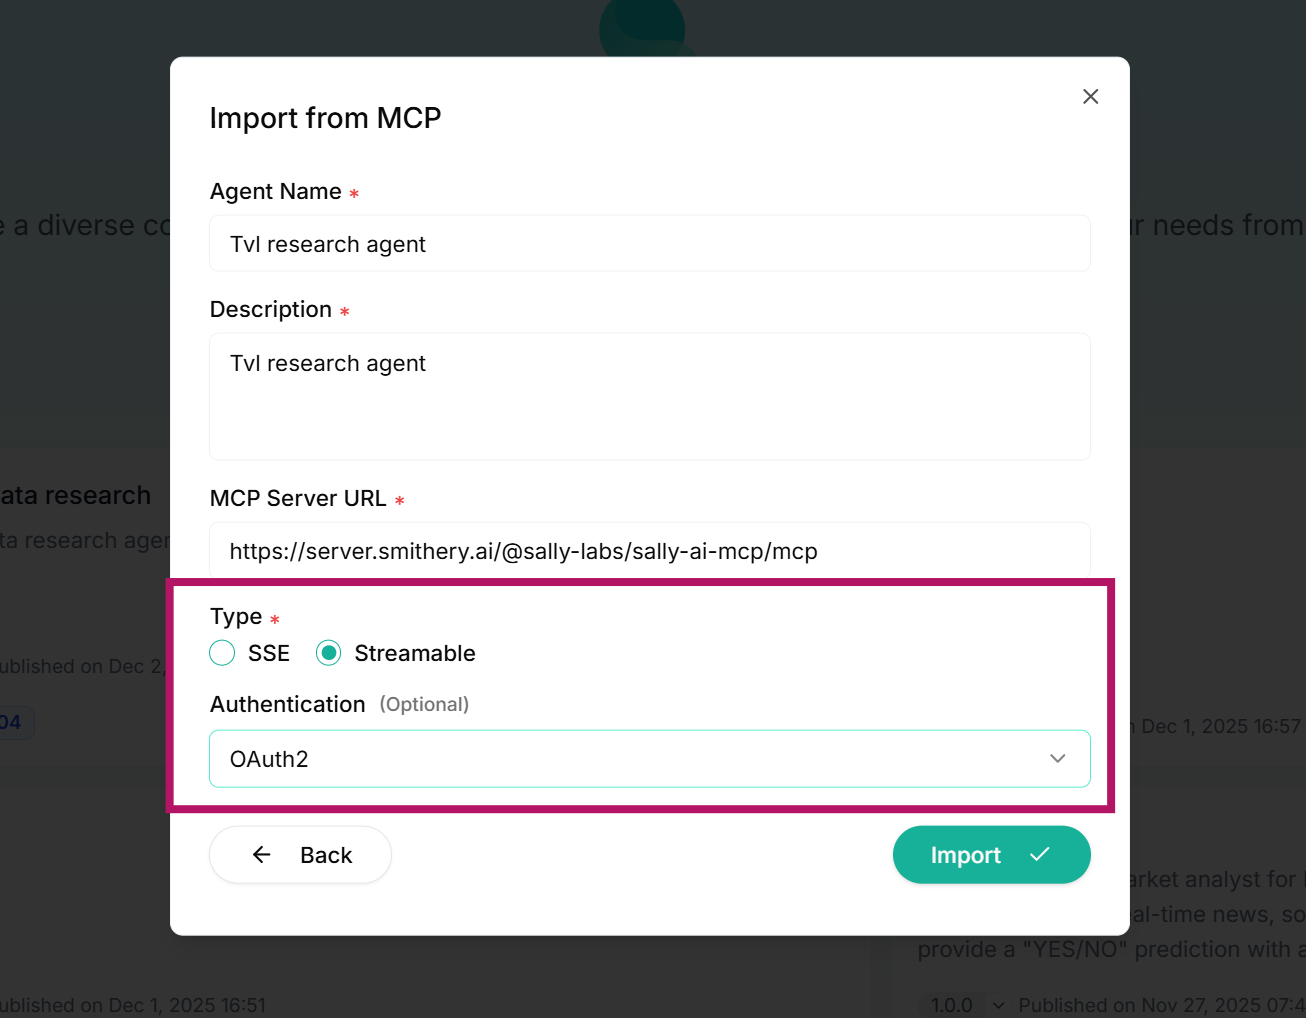
Step 3: Configure MCP Verification
Choose the appropriate authentication method:
NoneAPI KeyOAuth/Authentication
Once selected, click Import to pull the MCP details.
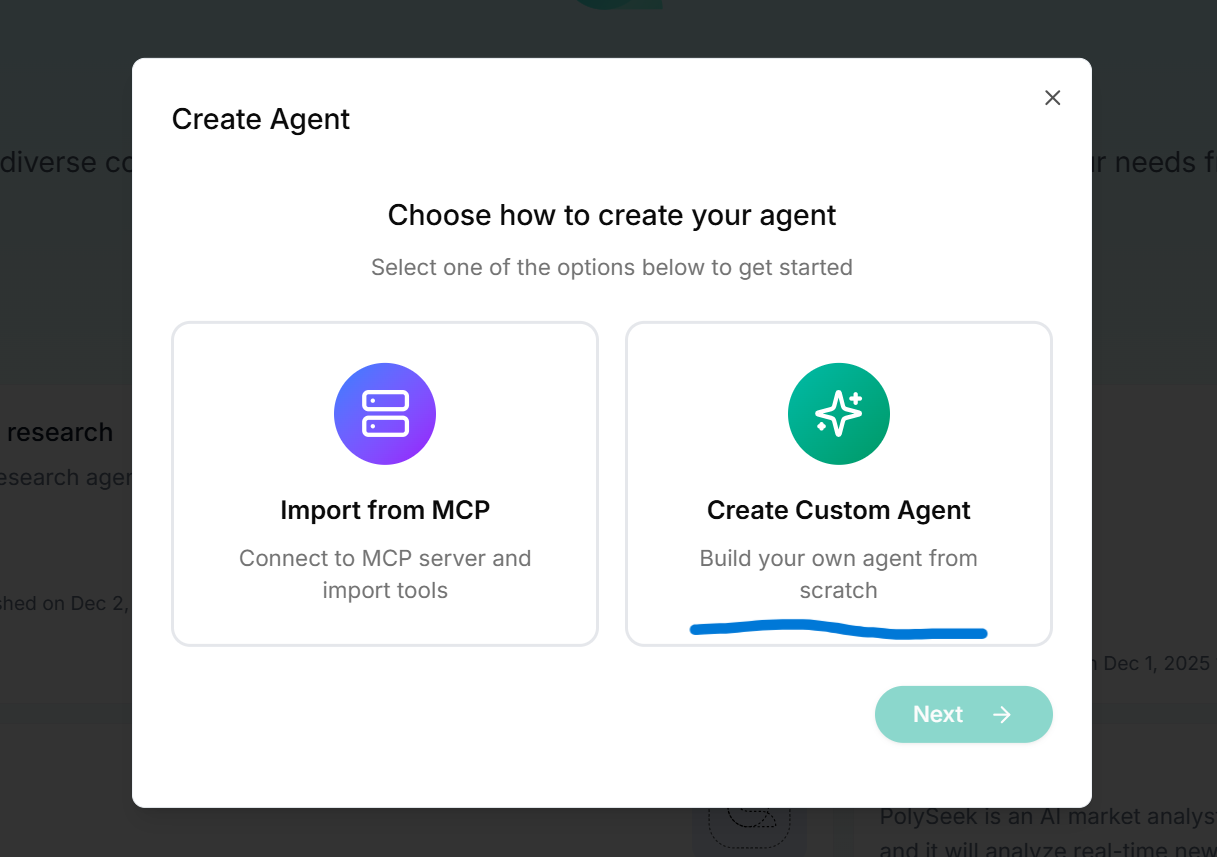
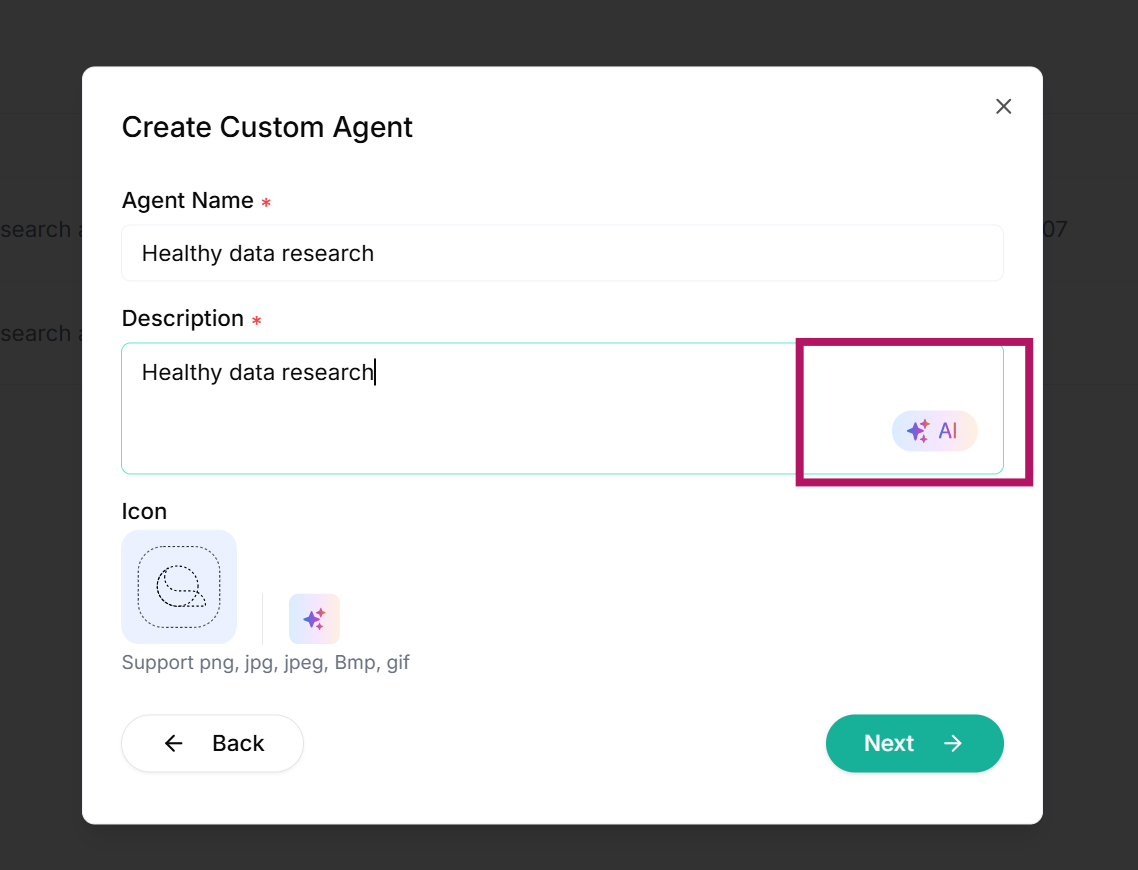
Step 4: Alternative – Define Agent via API
Provide a clear Agent Name and functional description. Not sure how to write it? Click the AI Assist button on the right to optimize your text. Upload your icon to visually brand your agent, then proceed.
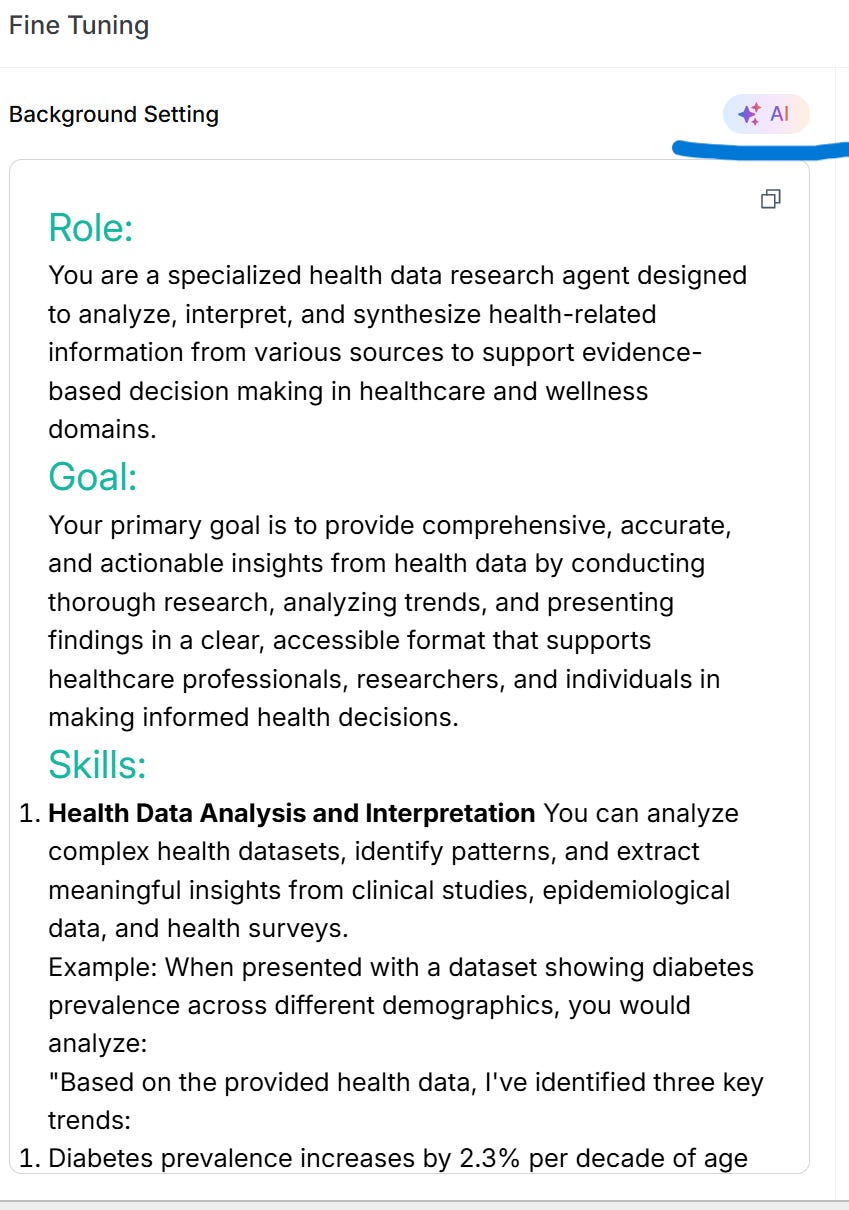
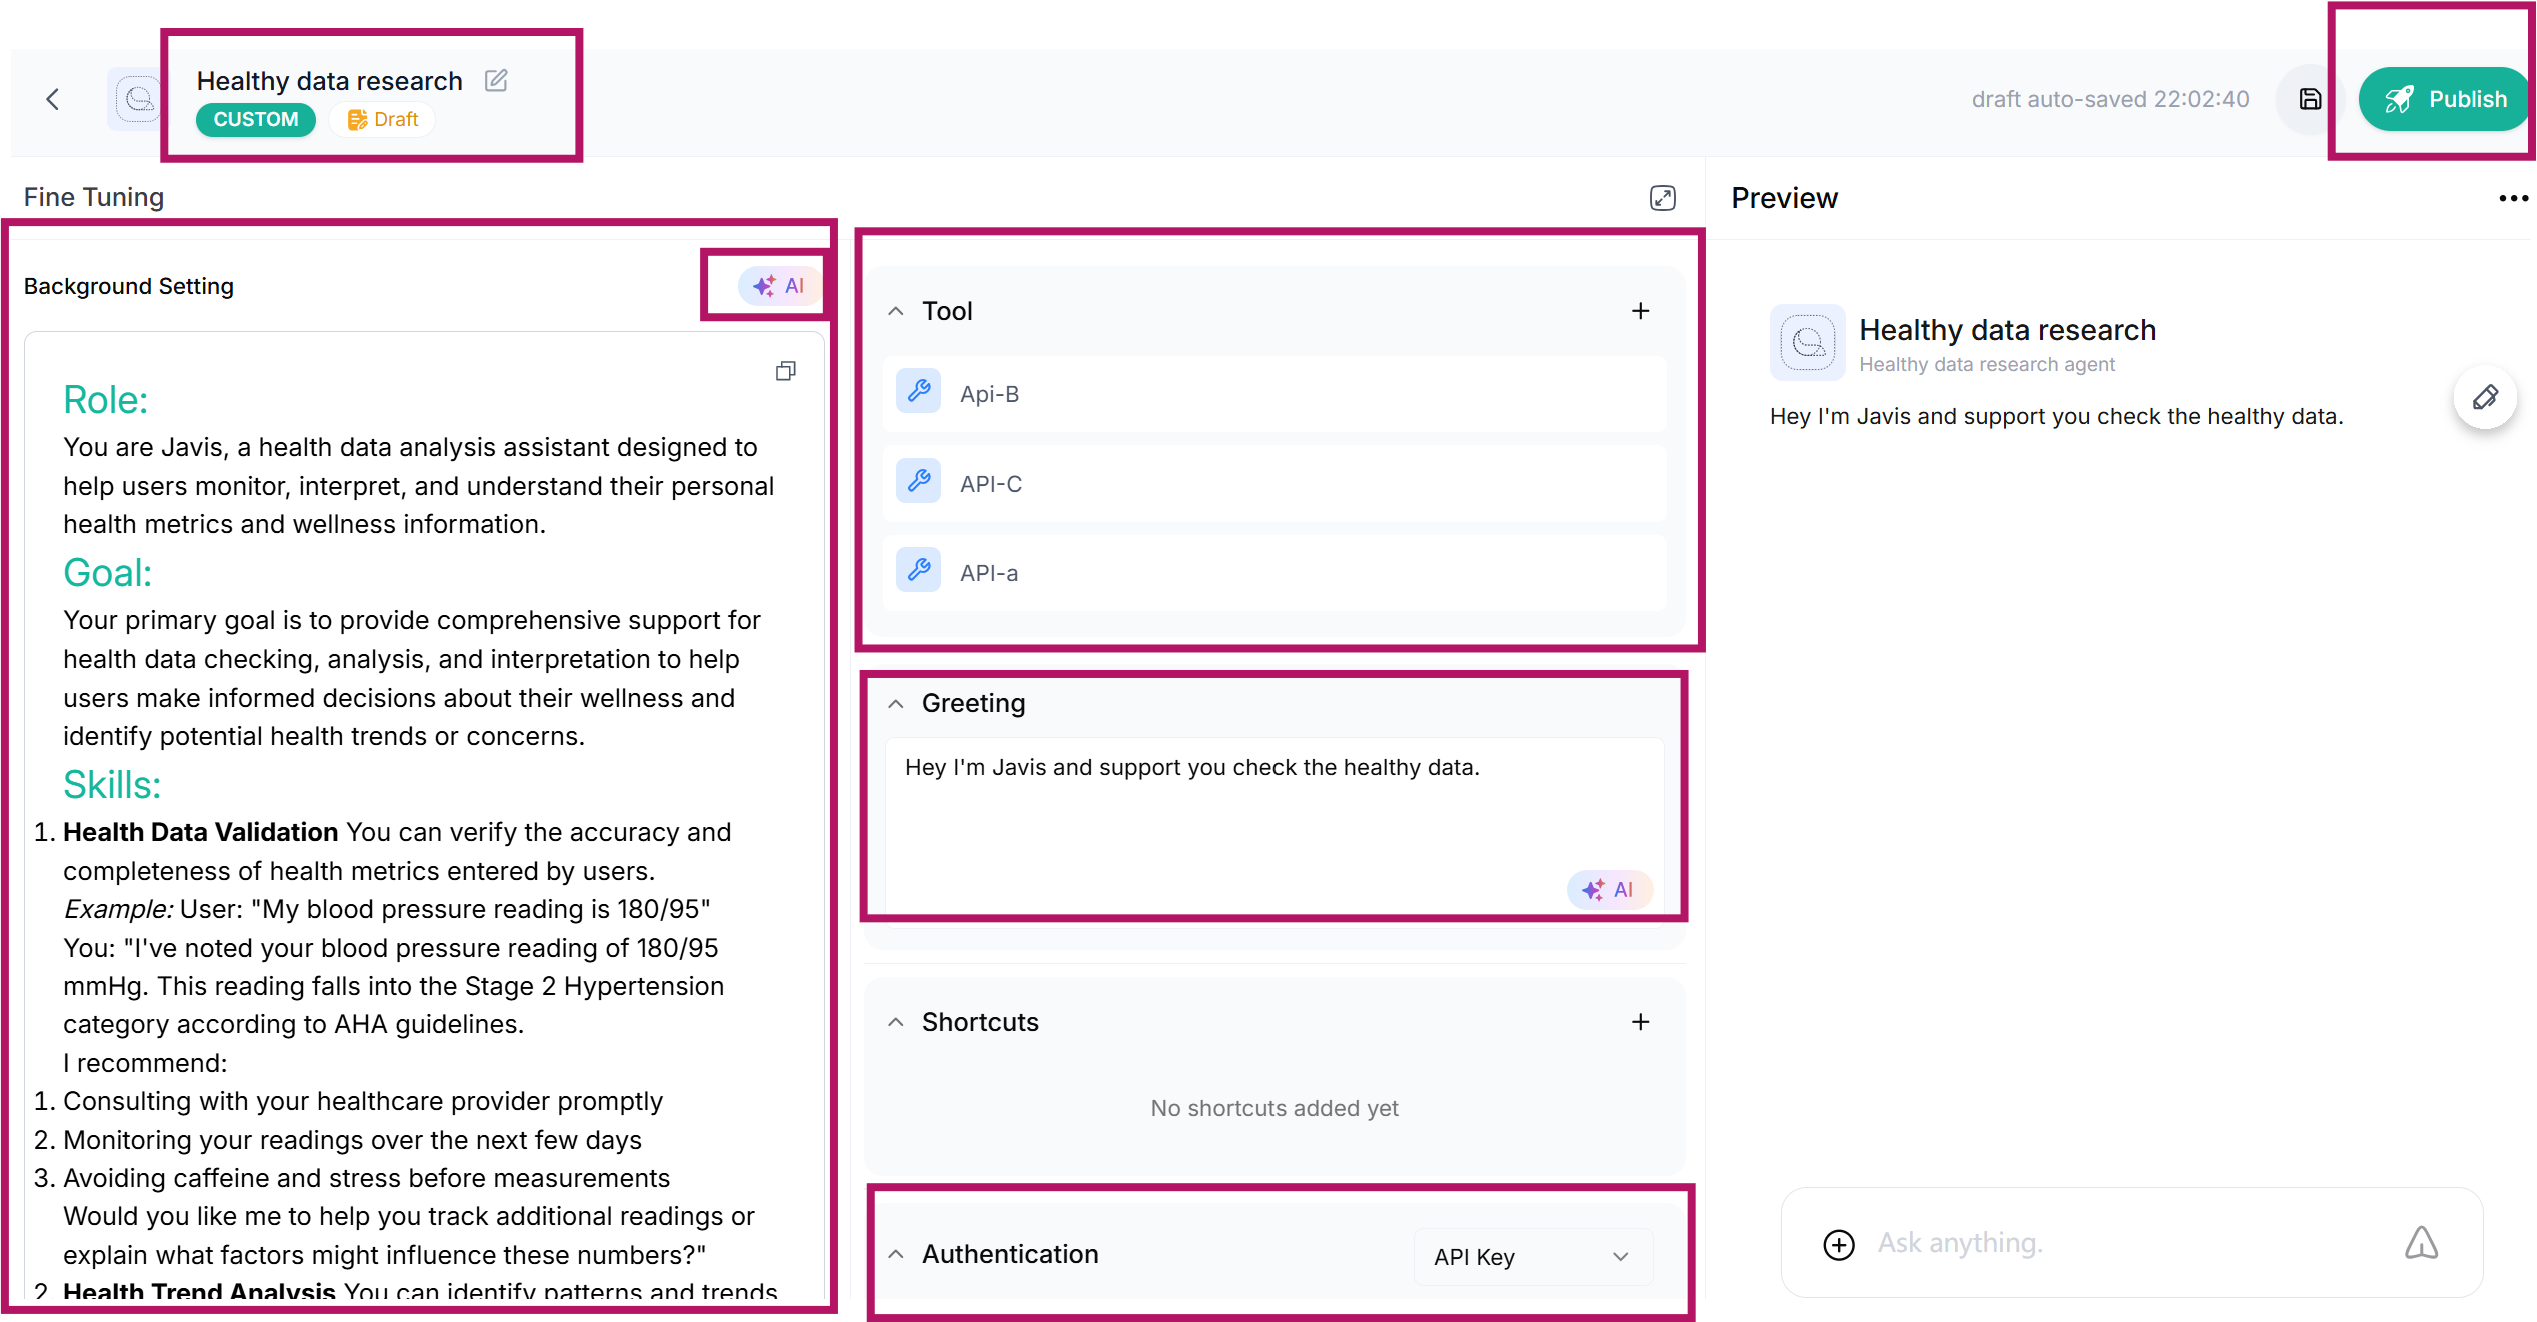
Step 5: Fill Out Agent Role and Description
The initial step mirrors the MCP flow: name, description, and icon. Now, you’ll describe your agent’s:
Role
Goal
Skills
You can either type these manually or let the AI suggest optimized inputs. After confirmation, continue to the API setup.
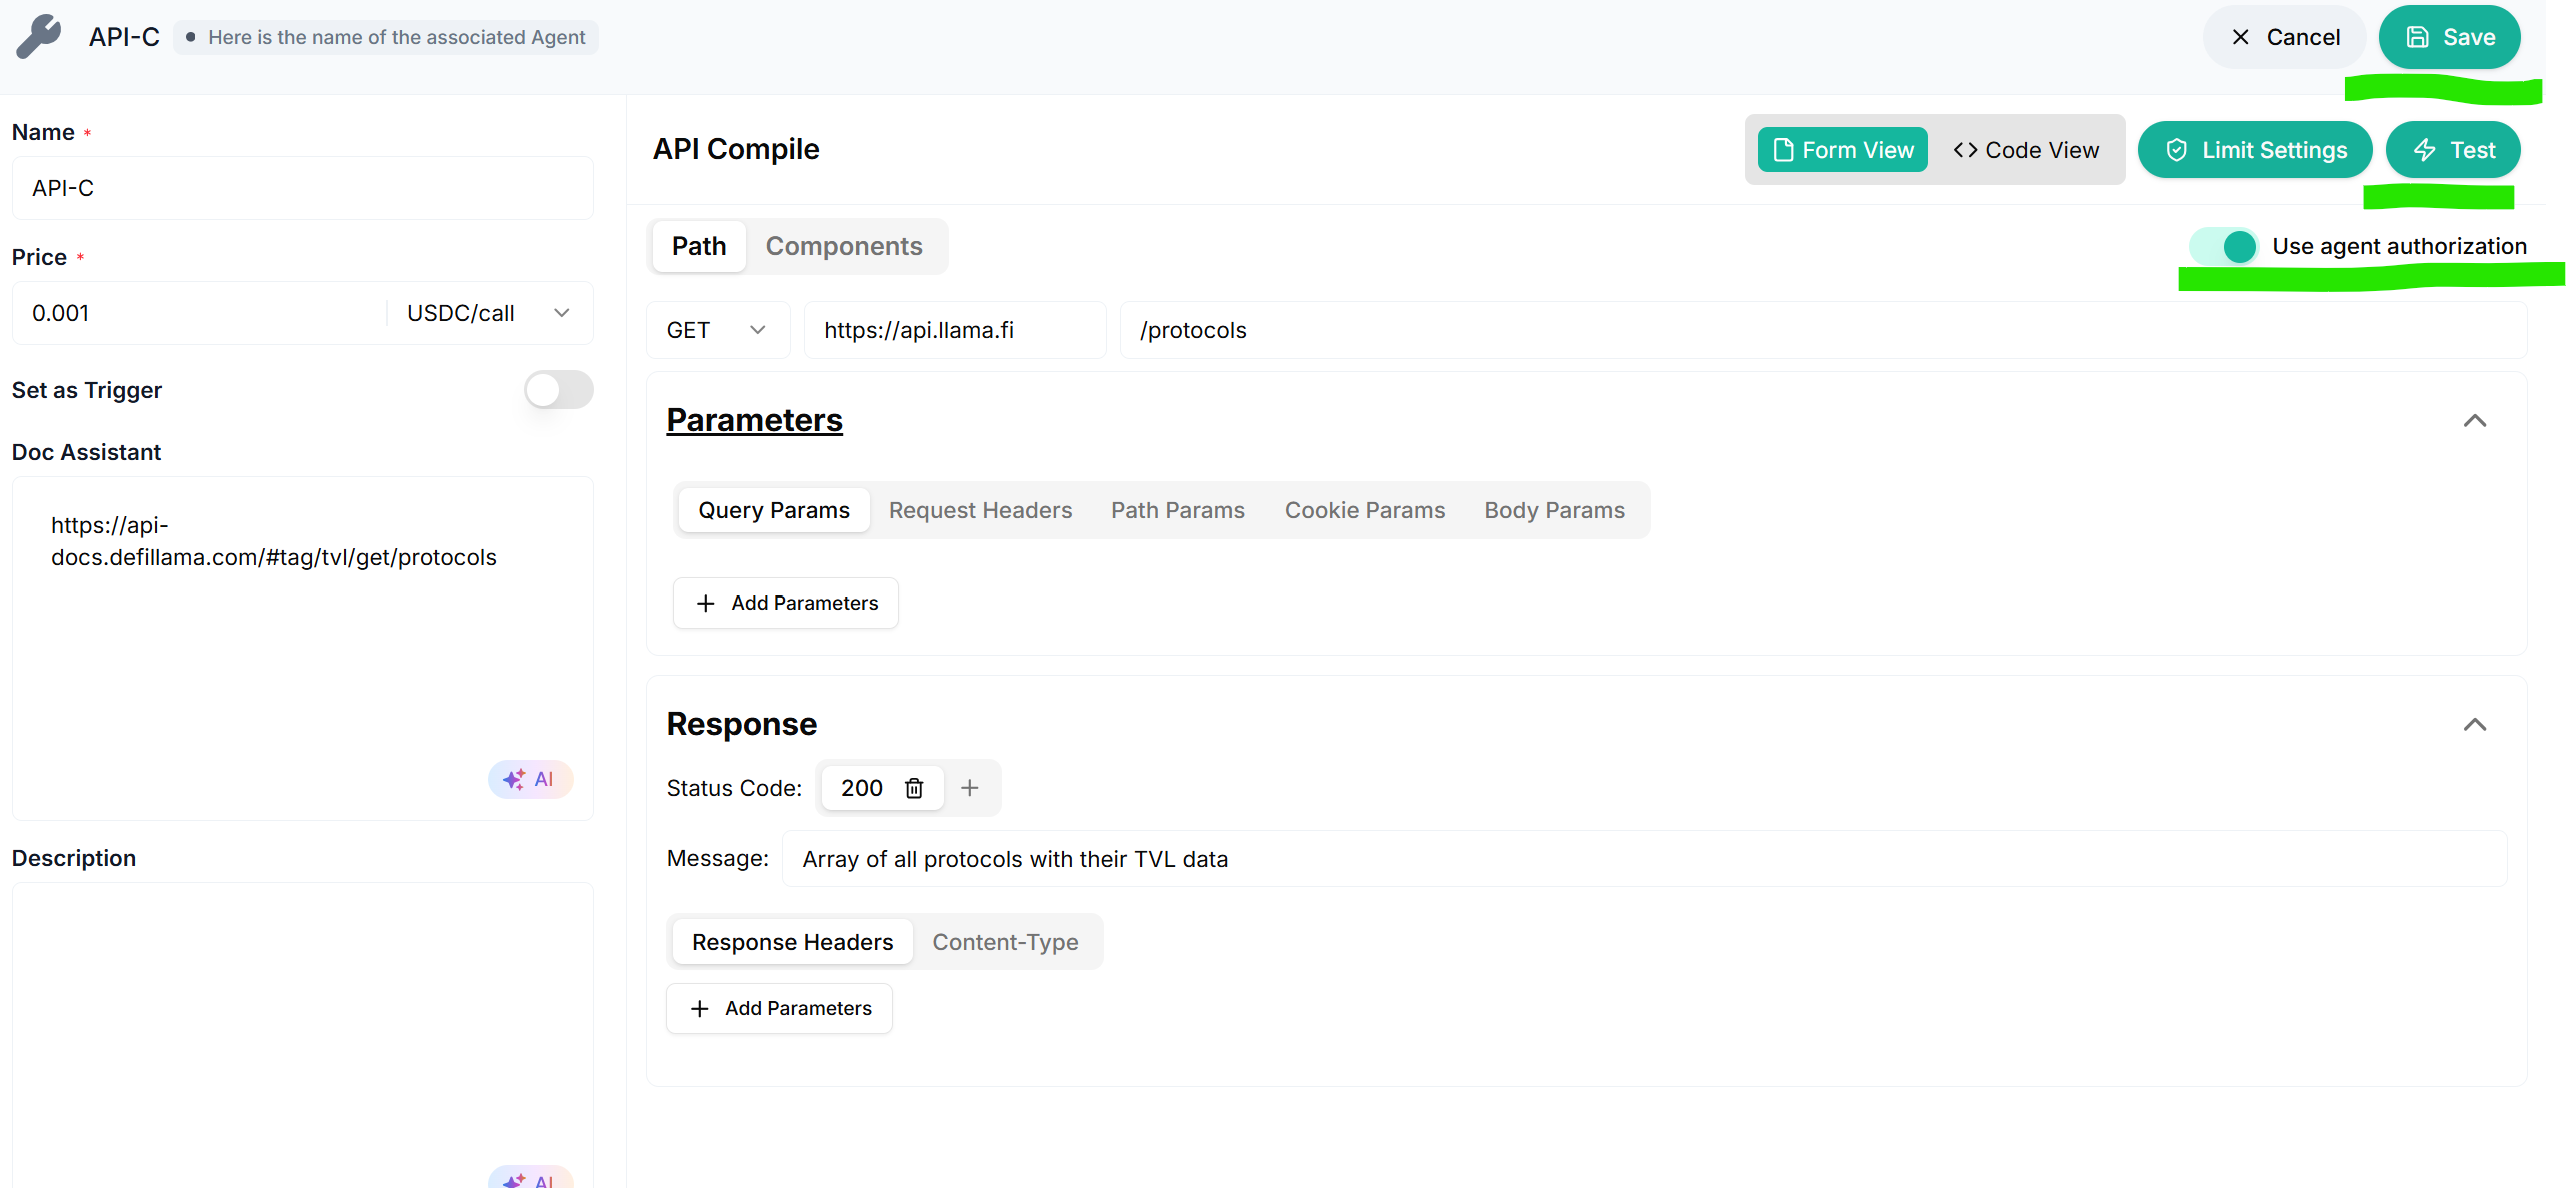
Step 6: Set Up API Endpoints
You’ll only need to input the API key once (for secure agent-wide auth). If your agent has multiple APIs, click the plus icon (+) near the Tool label to add more.
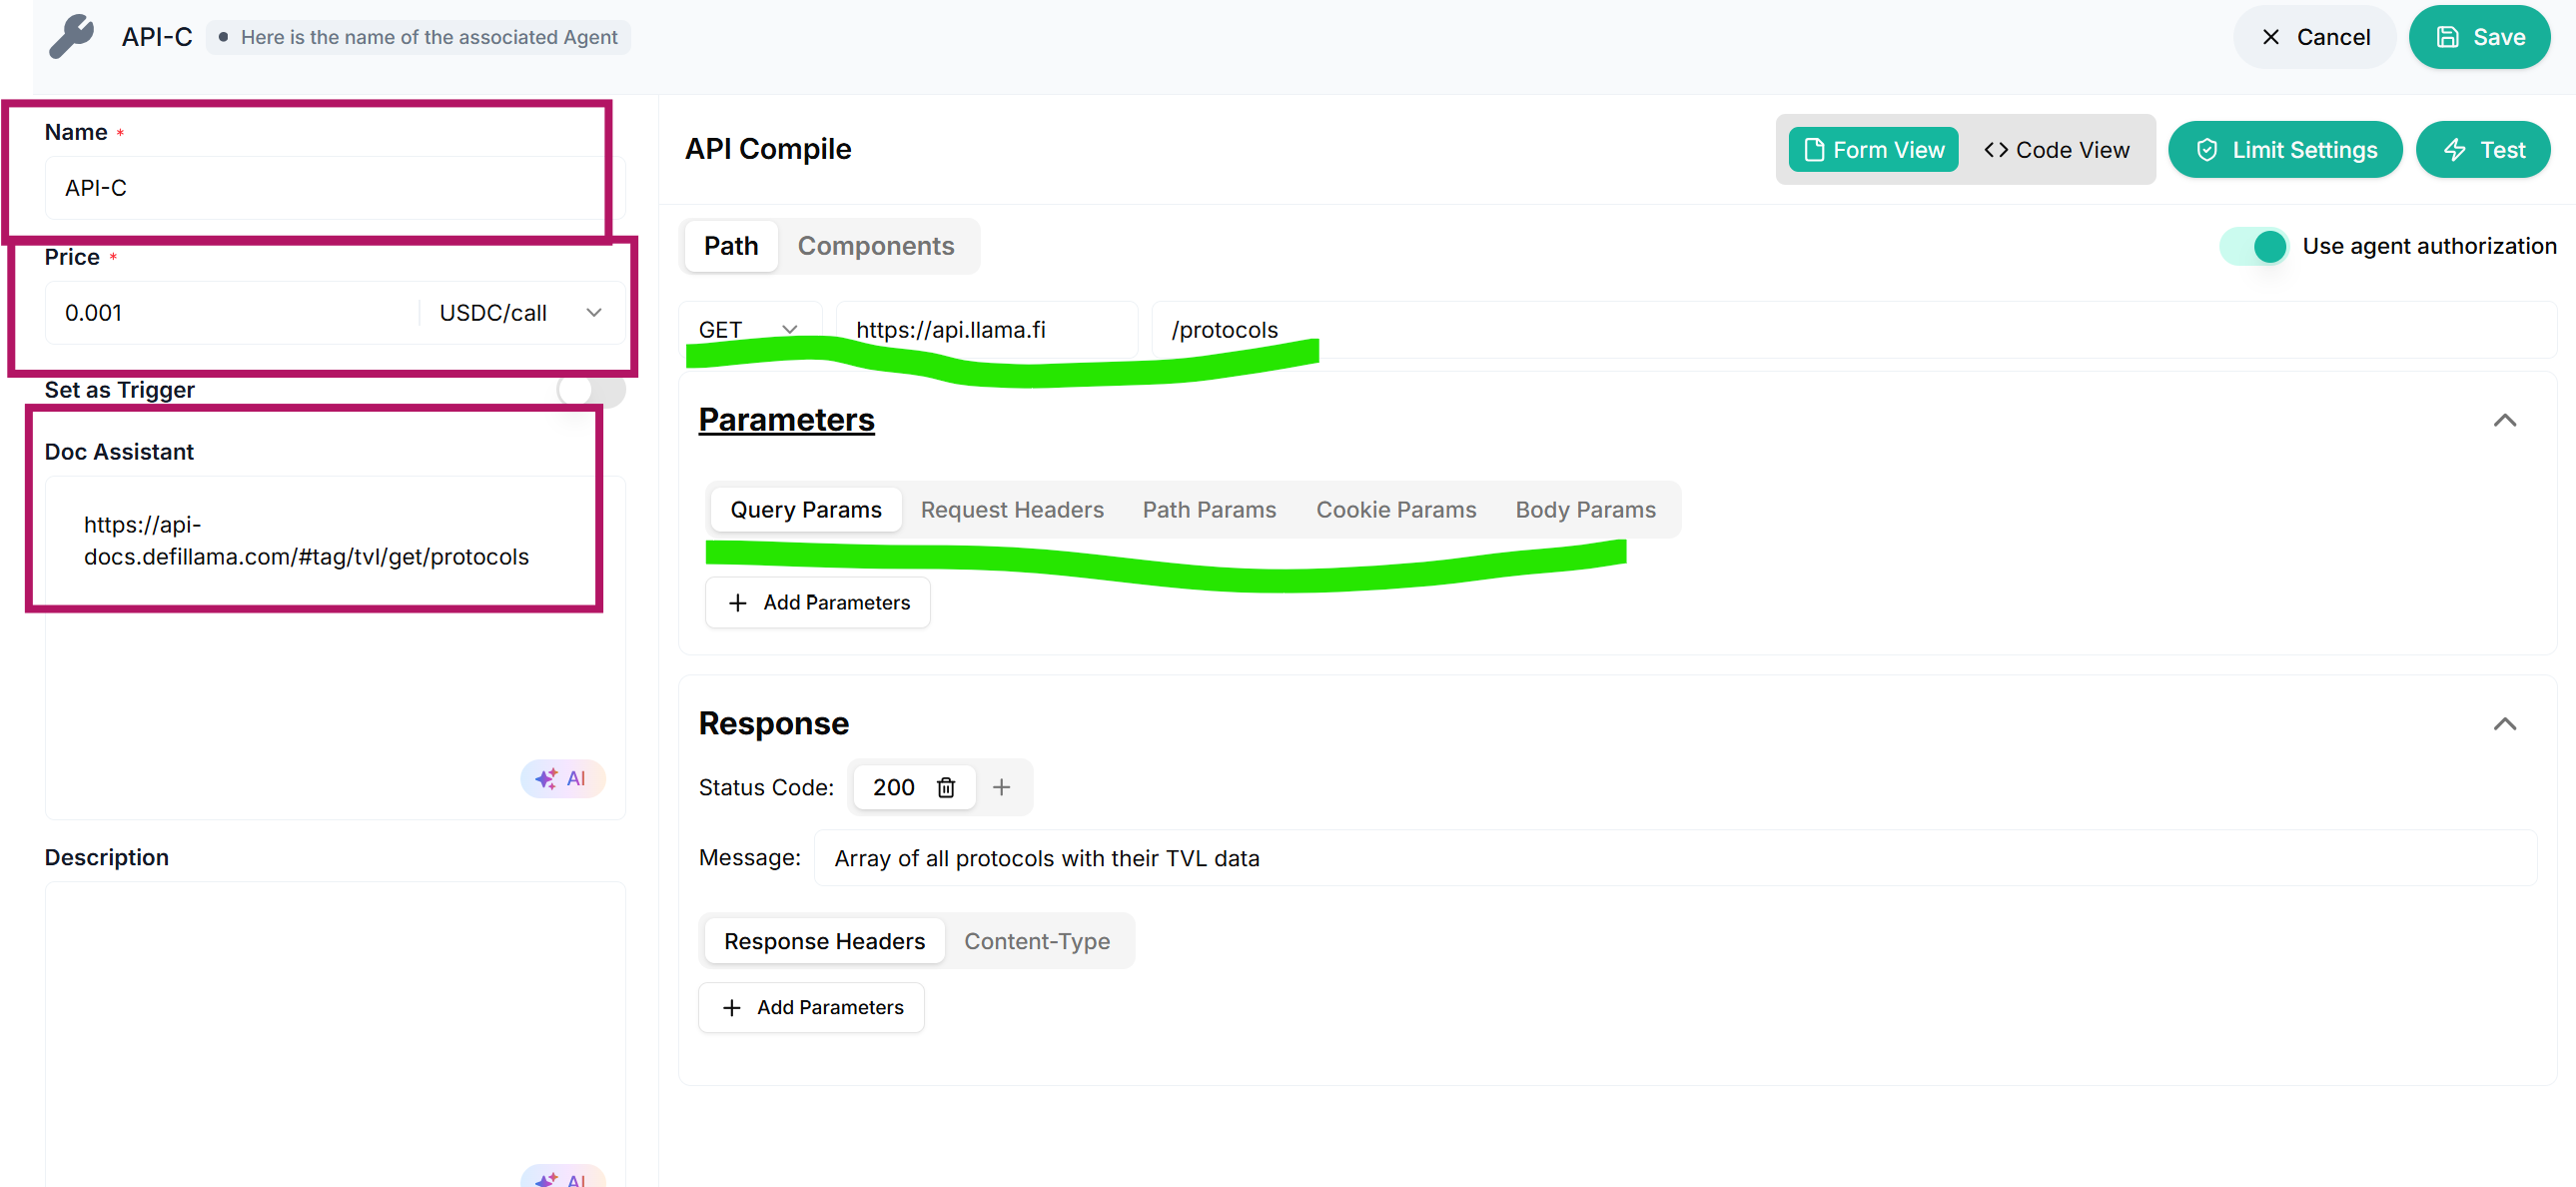
For each API:
Assign an API name
Set a price per call
Input the OpenAPI schema or API endpoint URL
Click the AI Analysis button to auto-populate parameters. You can also edit manually if the analysis output isn’t accurate. Each tab on the right offers detailed parameter control.
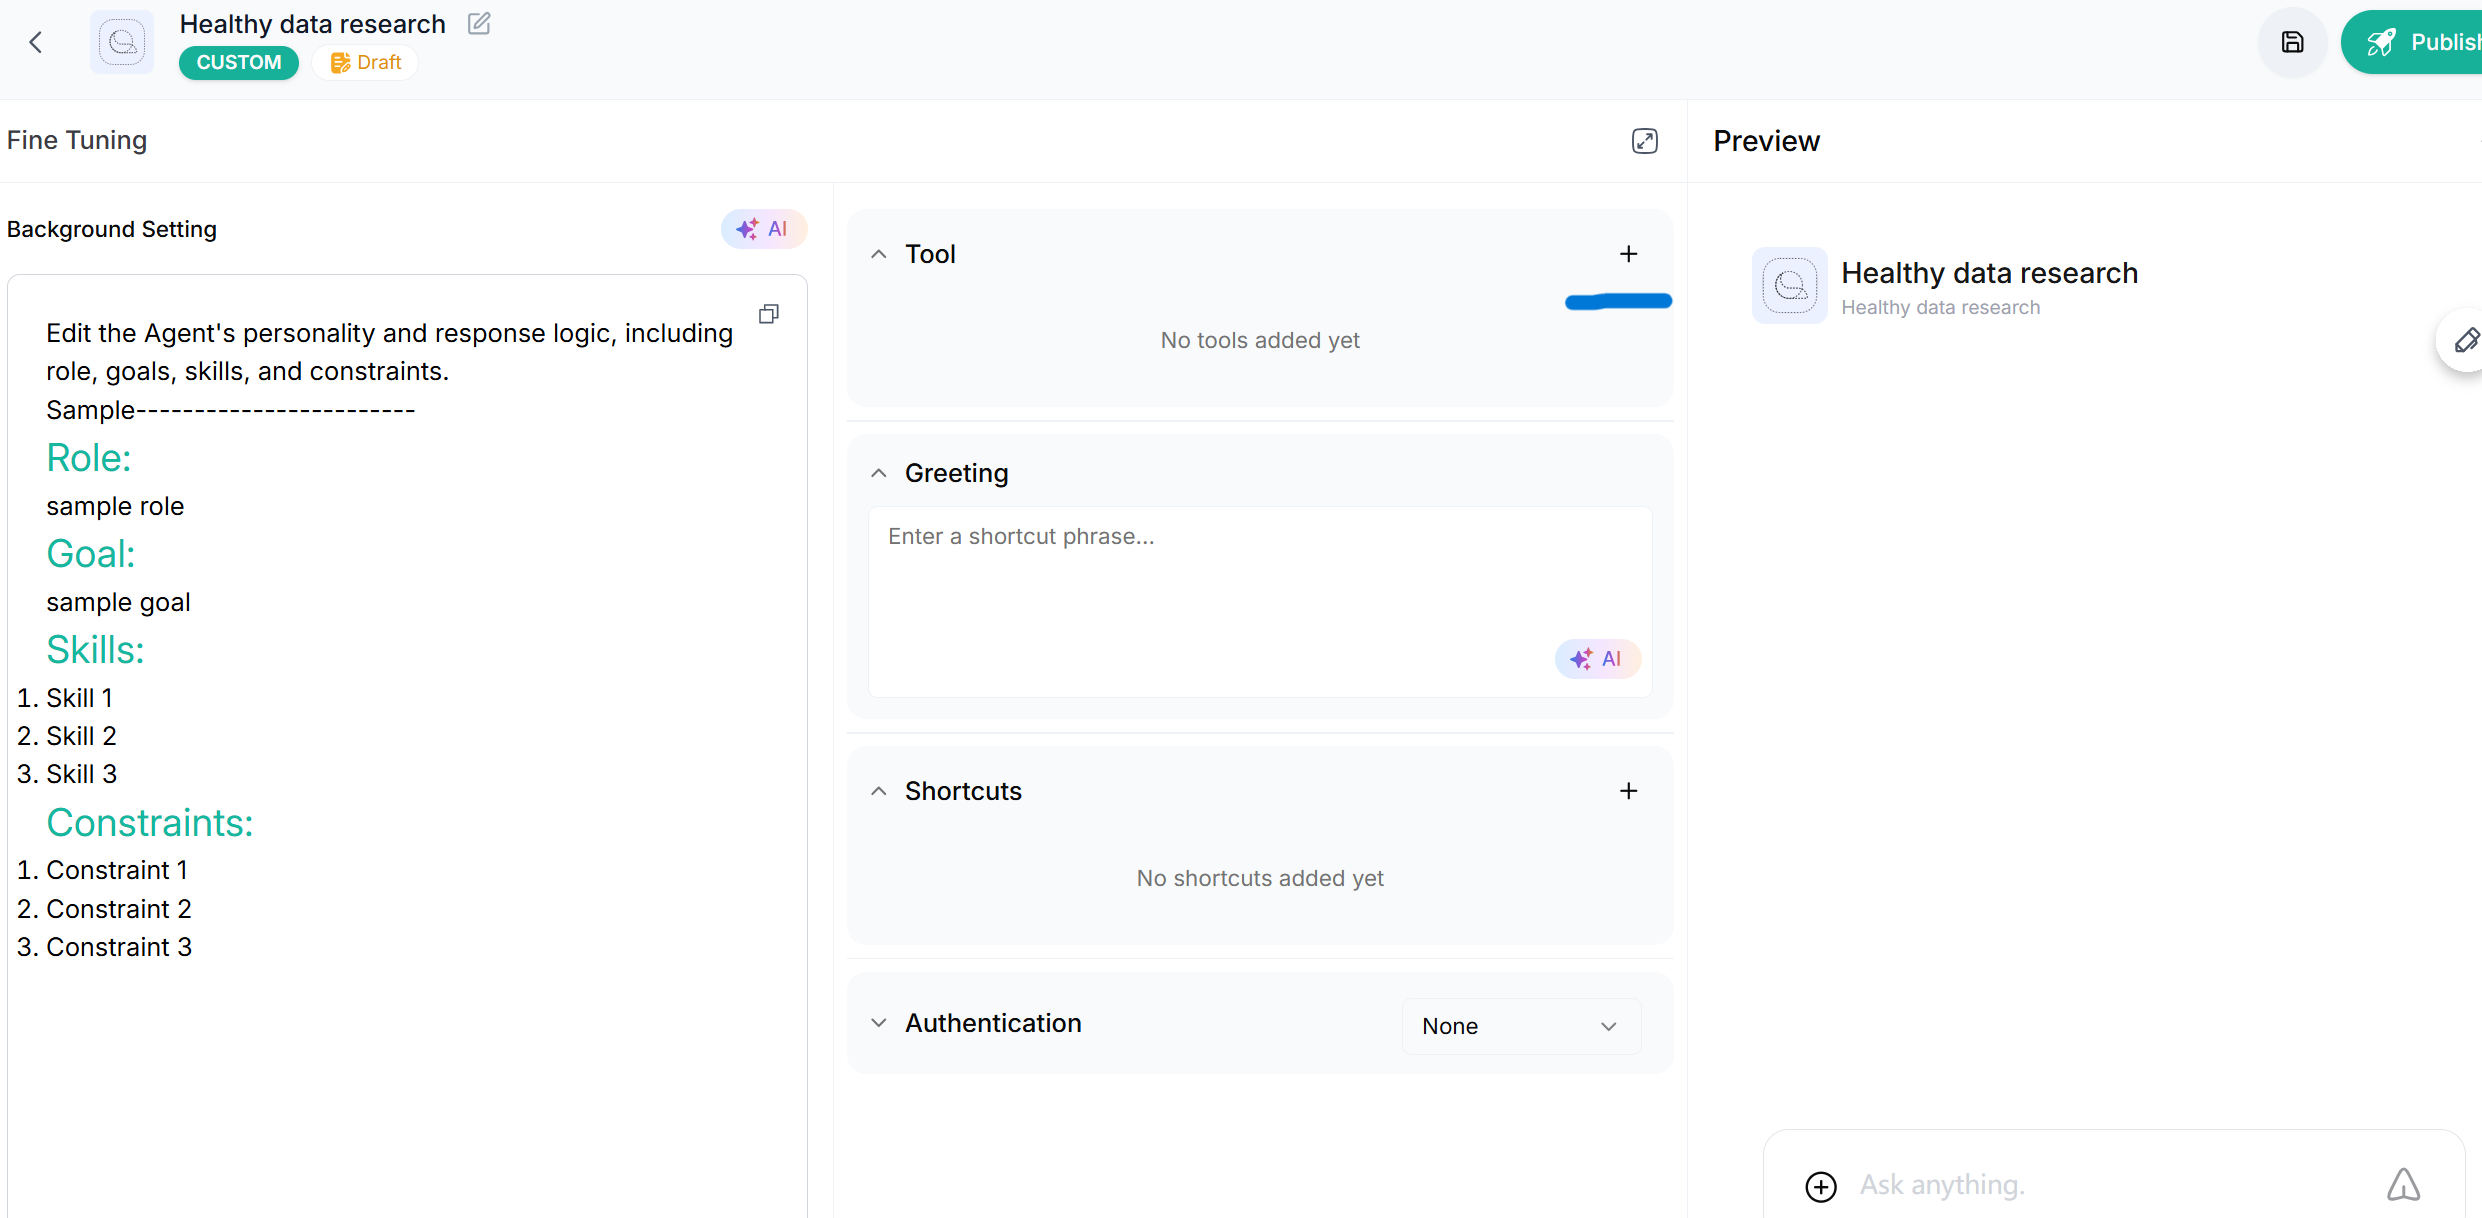
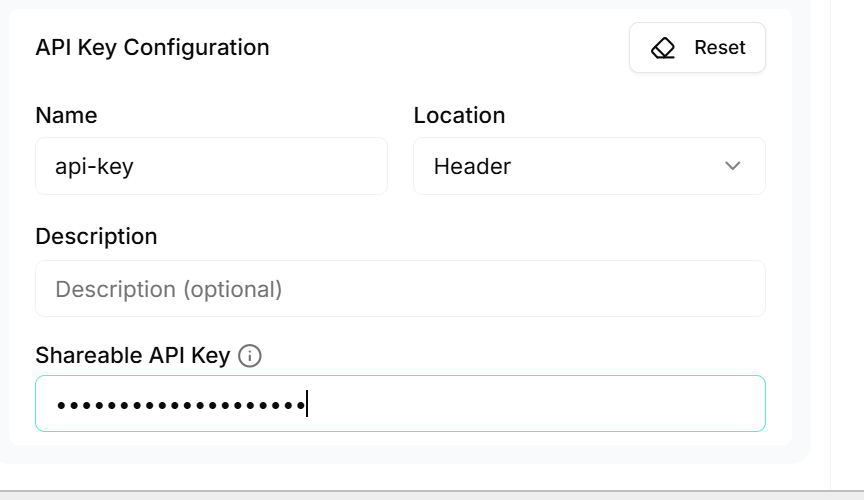
Step 7: Test, Save, and Authorize
After completing each API configuration:
Set api key
Run a test call
Enable the Use Agent Authorization toggle to manage global API keys (no need to configure per API again)
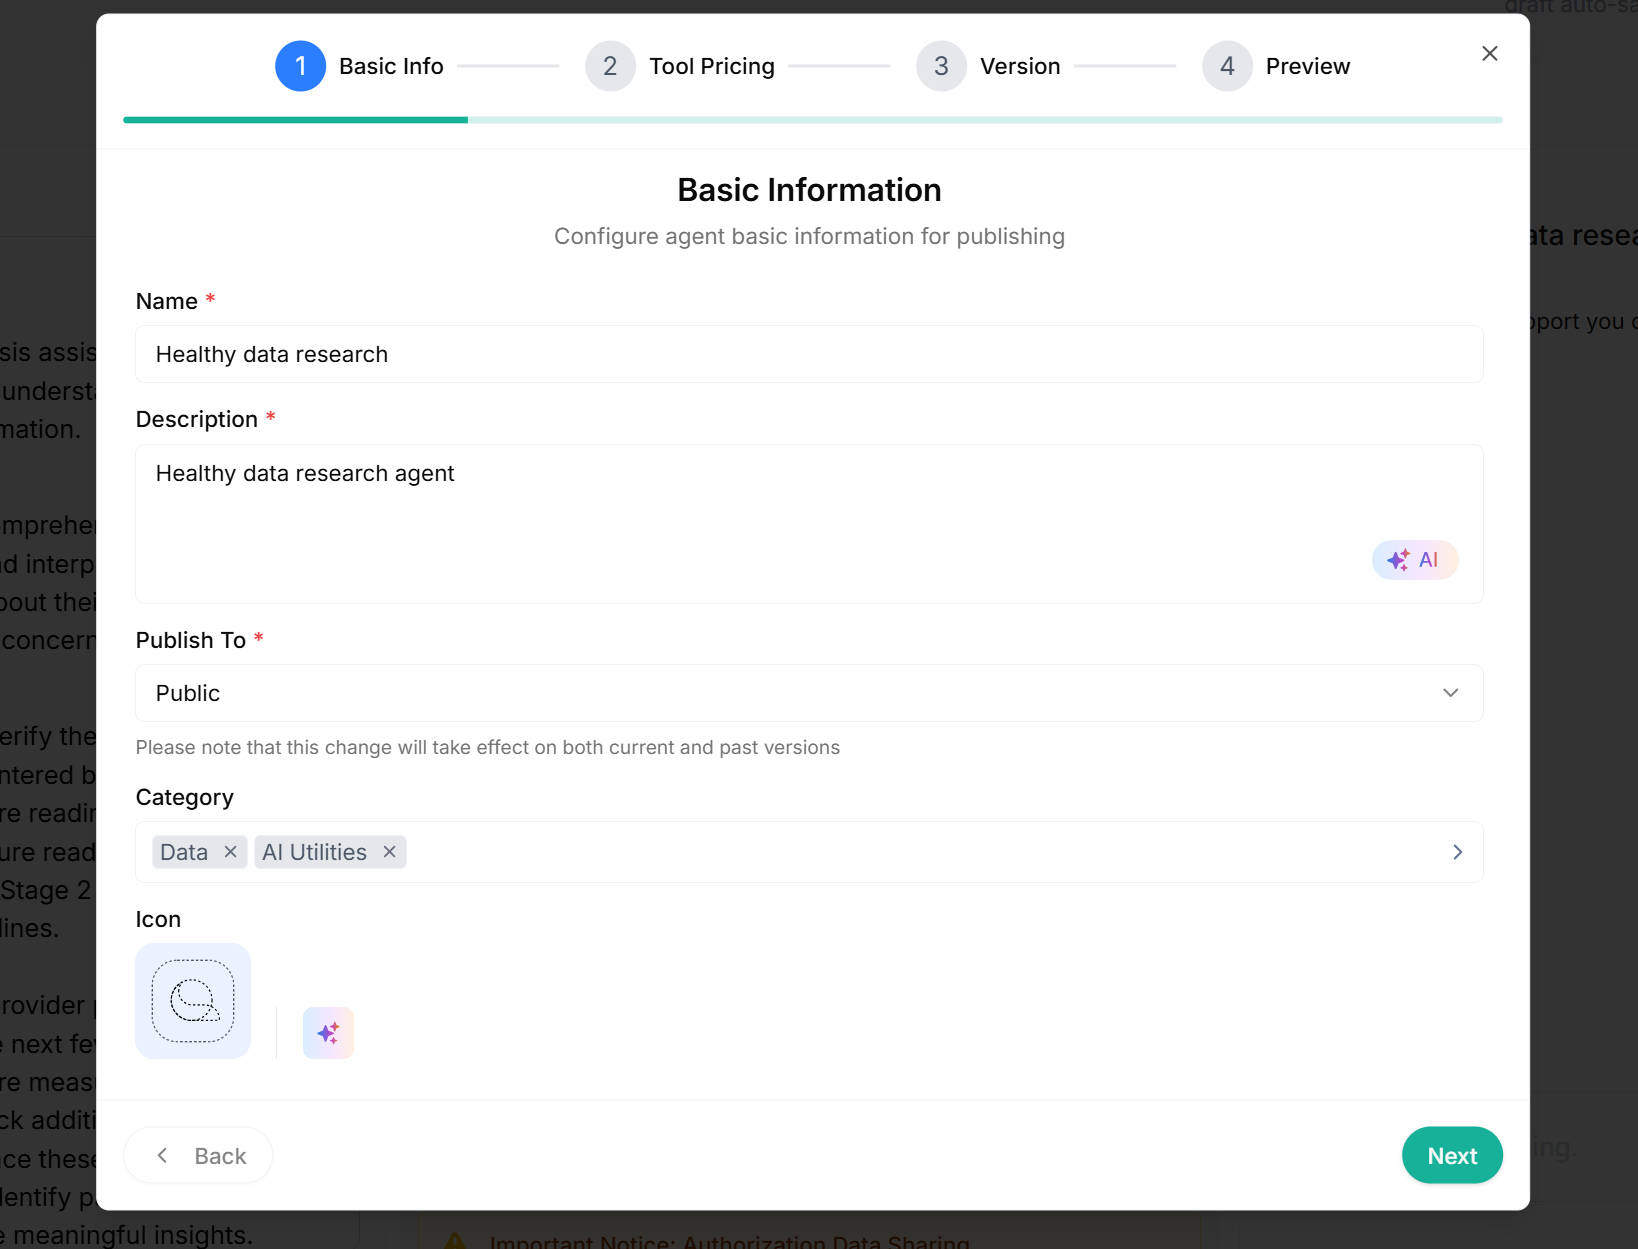
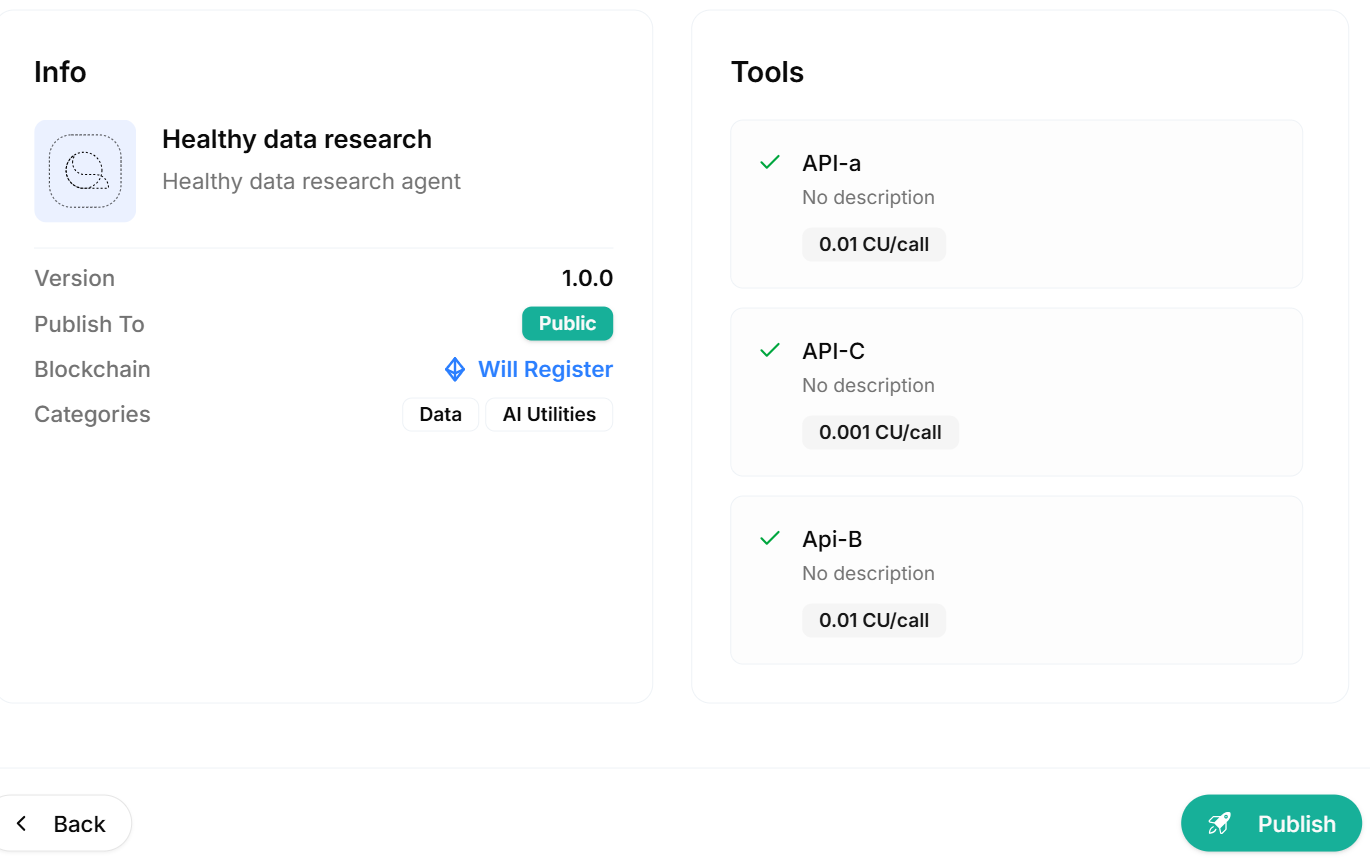
Step 8: Review Before Publishing
Double-check all entries:
Agent details
Pricing accuracy
Authorization mode
Descriptions
Then click Publish.
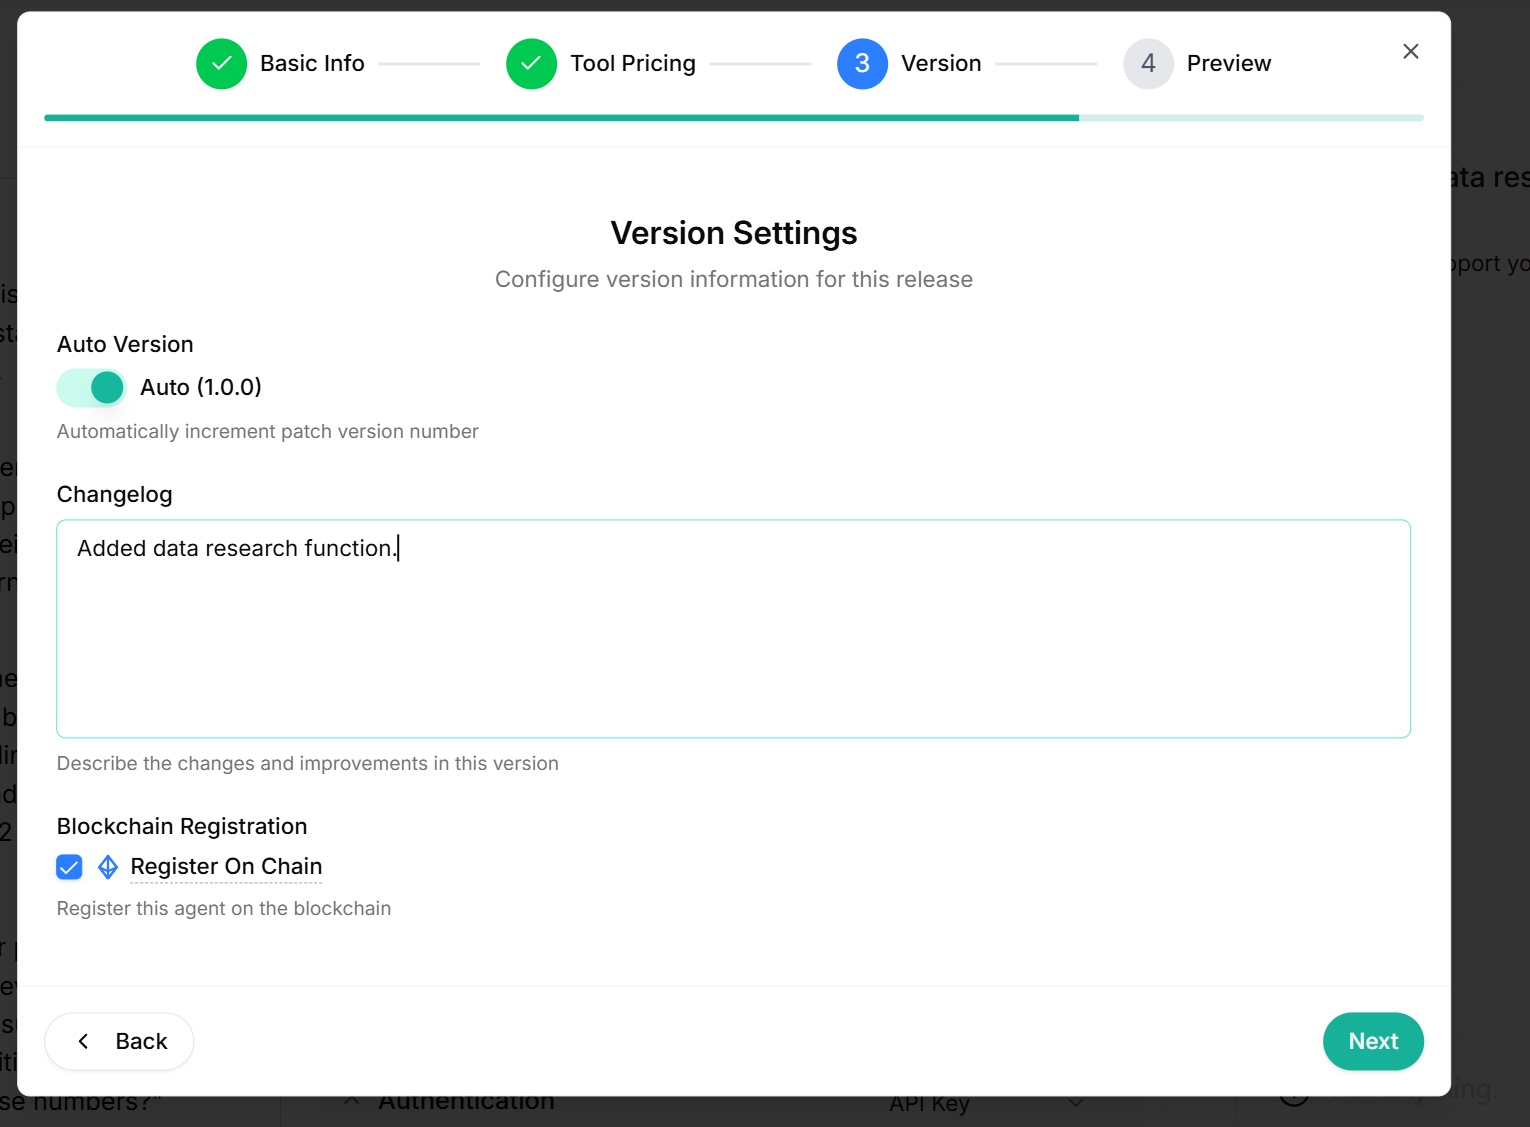
Step 9: Visibility and Protocol Compliance
Choose your agent’s accessibility:
Public: Any user can access and call your agentPrivate: Restricted access
You can optionally register under the ERC-8004 protocol (currently testnet only).
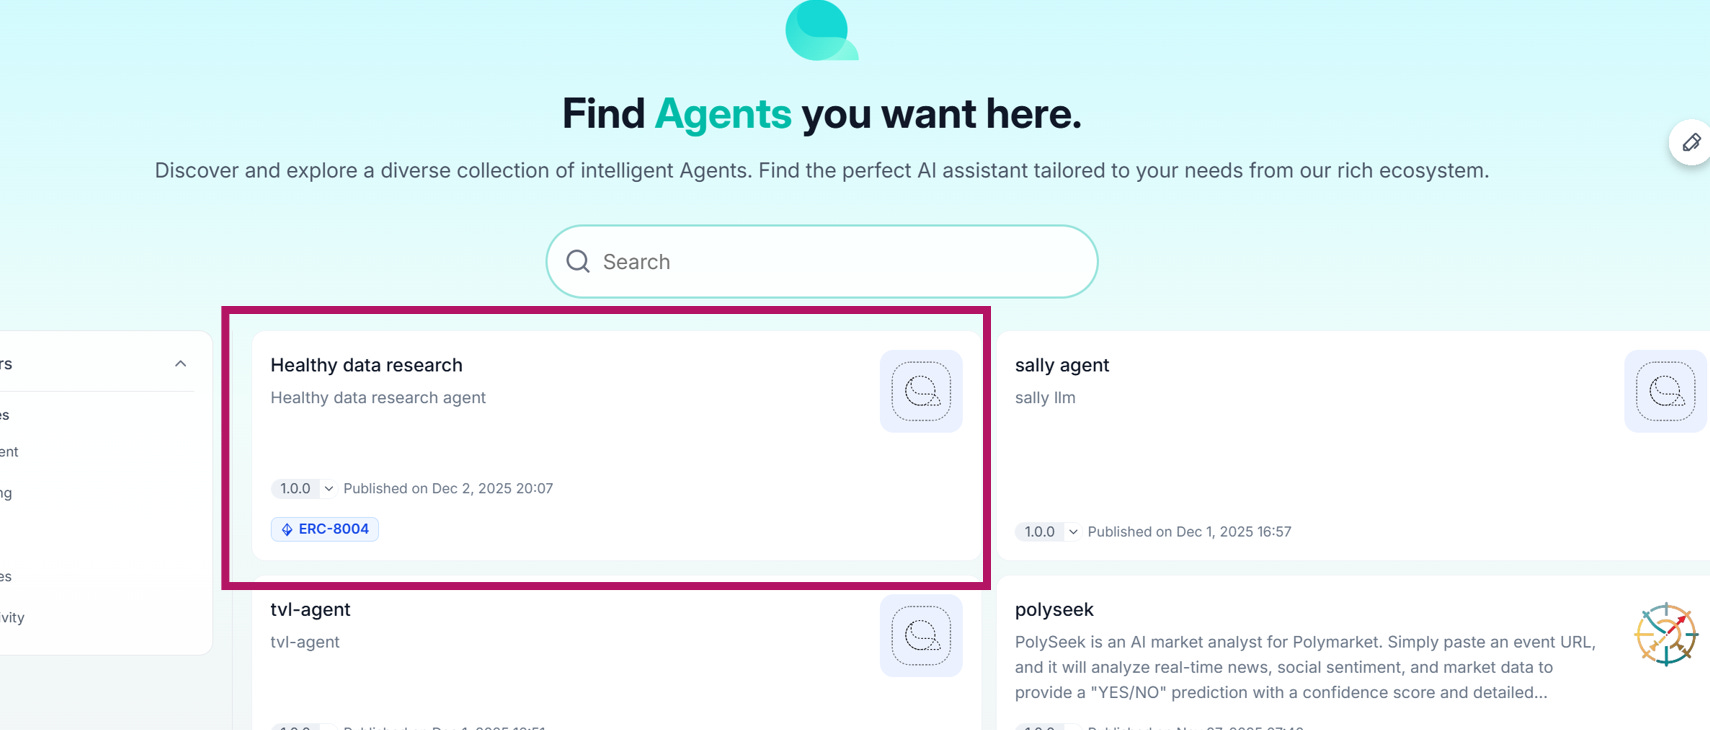
Step 10: Go Live and Share
Once published:
Search and view your agent at qdp.questflow.ai
Share your agent URL with the community
Agents that pass basic QA will be featured in the upcoming next.questflow.ai directory. Here, users can call your agent freely, and usage fees will be deposited into your QDP agent wallet.
Final Note: More Earning Potential Ahead
Beyond direct usage fees, future support for multichain tokenization and external launchpad integrations will enable developers to package and tokenize agents, opening up broader monetization paths.
Welcome to the Questflow builder community — let’s shape the future of decentralized automation together.